In this article we discuss freediving safety, setting up a freediving line system and how you can identify and mitigate risks in freediving. We also have safety tips & tricks from Gary McGrath and a gear review of Alexander Bubenchikov’s 2BFree Equipment.
Highlights
- Freediving safety is approached similar to other sports (i.e. climbing)
- We should think in terms of risk management assessment
- This analytical approach helps to identify and mitigate overall risk
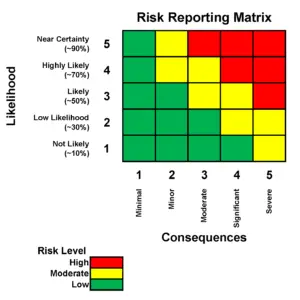
- The Risk Matrix is a way to assess the likelihood and consequence
- Learn to tie knots and learn about climbing systems for freediving
- I discuss my line freediving setup and a few tips & tricks
- Use good gear: here we tested the 2BFree Equipment for safety and use
- Top 5 tips on safety from coach and deep safety Gary McGrath
Reading Time: 9 minutes
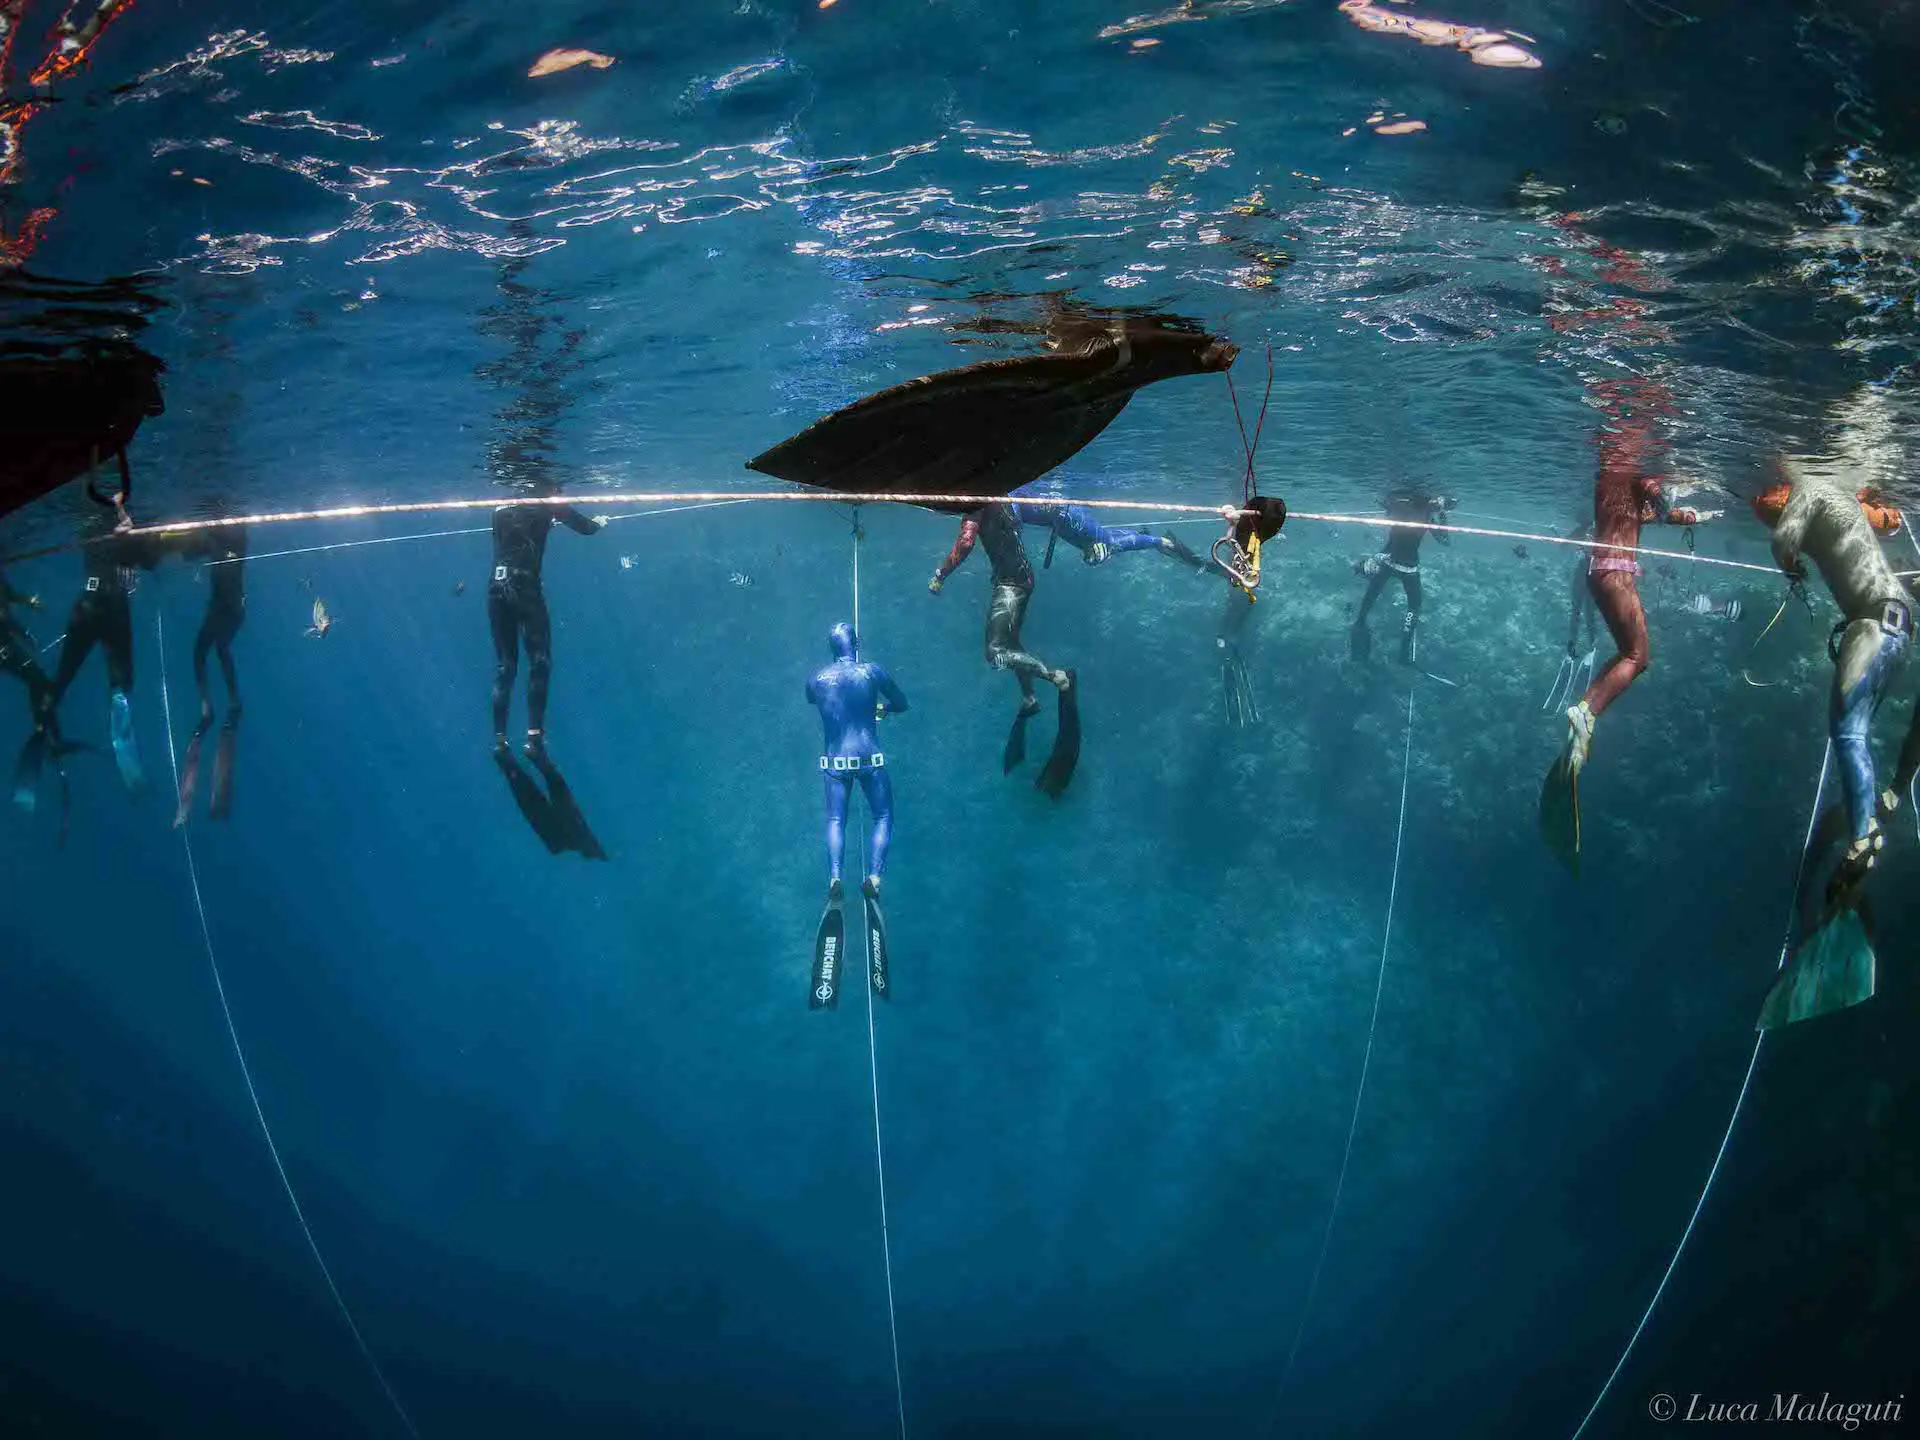
Safety Systems in Freediving
I’ve been “lucky” enough to witness a few freediving accidents to date. I myself, have also been involved in a few. These can be incredibly important learning lessons for most starting off in this sport.
It’s quite simple really, and like with any other sport: time and repetition. You do something for long enough, you’re bound to, statistically, see the ups and downs.
Whether it’s a deep freediving training session, climbing a mountain or an engineering infrastructure project, accidents can occur. These accidents are evaluated by their risk. Risk is based on likelihood and consequence.
When it comes to reducing the overall risk of an accident, we have to consider two elements: the probability (or likelihood) and the consequence.
In this article we discuss risk, how to assess risk and how the elements of probability and consequence help you analyze overall risk.
But first…
Gary McGrath’s Top 5 Tips on Safety
Gary McGrath has an incredible sense of humour, but when it comes to safety he doesn’t kid around. With experience as deep freediver, coach, tree surgeon and deep safety for the Blue Element Competition, he’s seen it all in freediving.
Here’s a few top tips well worth writing down:
- A great way to mitigate risk is to surround yourself with reliable, trustworthy individuals.
- Complacency is a killer, treat every day as if it was your first day, be as careful as you were the first time you set up your dive rig.
- Don’t assume anything, don’t assume someone else will check something before you do.
- Safe practices need drilling, how many of us dedicate time in our training plans to rescues and emergency procedures?
- Freediving is a very safe activity if people are trained right, If people get involved and don’t have the skills, then the risk goes way up!
Follow Gary here, on his incredible journey as he trains towards the British National Record.
The Risk Matrix
The goal, for every instructor, coach and athlete, is to identify any potential hazard and start thinking in terms of the Risk Matrix. It’s a very analytical approach yes, but one that can help to reduce how often accidents happen and what their impact is.
Probability vs. Consequence
- Probability: What is the likelihood, given a particular time frame, for an accident (within a particular setting) to occur.
- Consequence: What gravity, danger or impact can such an accident have people and property if it were to happen.
In engineering, we discuss this in the risk management of a project. In order to mitigate the risk of a project, we strive to reduce potential hazards. We first consider what is the probability/likelihood on an incident. Then, if that accident were to occur, what is the likely impact or consequence it can have?
When assessing potential hazards we must therefore think in these two terms: probability/likelihood and consequence. This can give insight to the overall risk level of a particular action. The risk level then allows us to prepare accordingly.
Think of the equation in this way:
Overall Risk = Probability x Consequence
That’s right, risk can be multiplied. This means that several little mistakes can compound to increase the overall risk of an accident. Small bad habits can compound into a catastrophic incident.
We, as instructors and athletes, should think in terms of likelihood (unlikely to very likely) and consequence (minimal to severe). This is also something we should introduce in education programs as well. It’s not hard to start being more analytical, and look at situations with forecasting of risk levels in mind.
Example of Risk Assessment in Freediving
Let’s imagine the the following scenario while analyzing in terms of risk assessment via the Risk Matrix:
- SITUATION: A freediving instructor ties a poor knot on the bottom weight. This knot is a simple bowline, with very little “tail” at the end. The bottom plate is lowered to a depth of 20 meters (65 feet) in water only 30 meters deep (100 feet) deep.
- SETTING: We’re in a popular freediving and scuba diving location such as The Lighthouse, Dahab. Below the freediving buoy (and thus bottom weight) are many scuba divers. It’s very choppy at the surface, there’s many waves. The bowline is a knot known to “slip” under repetitive cyclical loads (read below to know more about this).
- RESULT: However unlikely, the knot loosens under the cyclical loading, and the bottom weight (10-15 kilograms) drops on the head of a scuba diver.
- RISK ASSESSMENT: The situation is UNLIKELY to happen, however the CONSEQUENCE is severe. OVERALL RISK is considered MODERATE-HIGH (yellow to red zone).
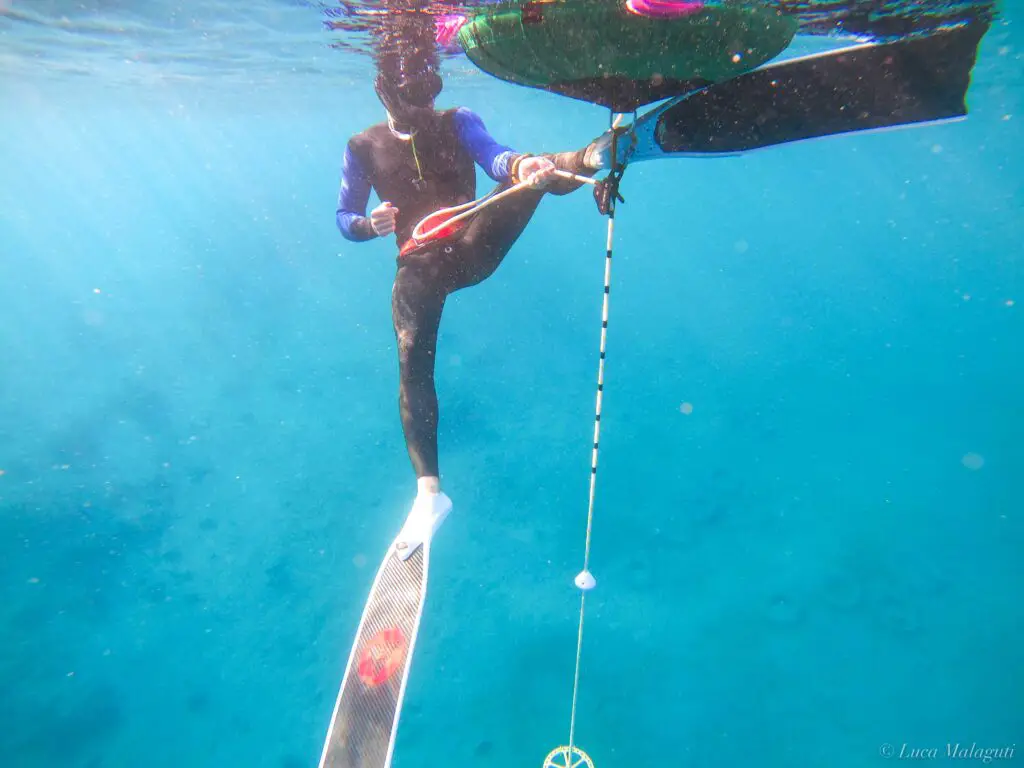
My Setup for Line Freediving
My new setup includes the following items. Please note there’s hundreds of ways to do this, I’m not advocating for one particular method. This method works for me and is quite secure. Please, simply prioritize safety and testing your setup and systems.
My line diving setup includes (from top to bottom):
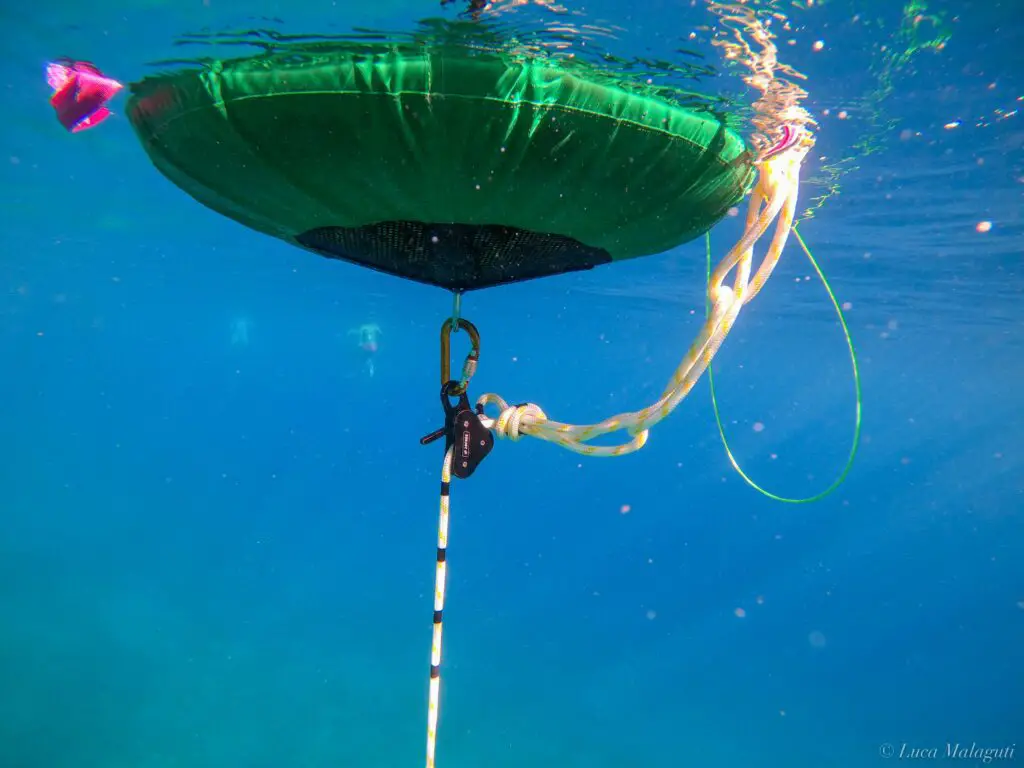
- A buoy (of appropriate quality) and three non-locking carabiners
- Five meters of surface line to tether
- A steel ring and one locking carabiner (i.e. Master Point)
- Pulley system
- Stopper
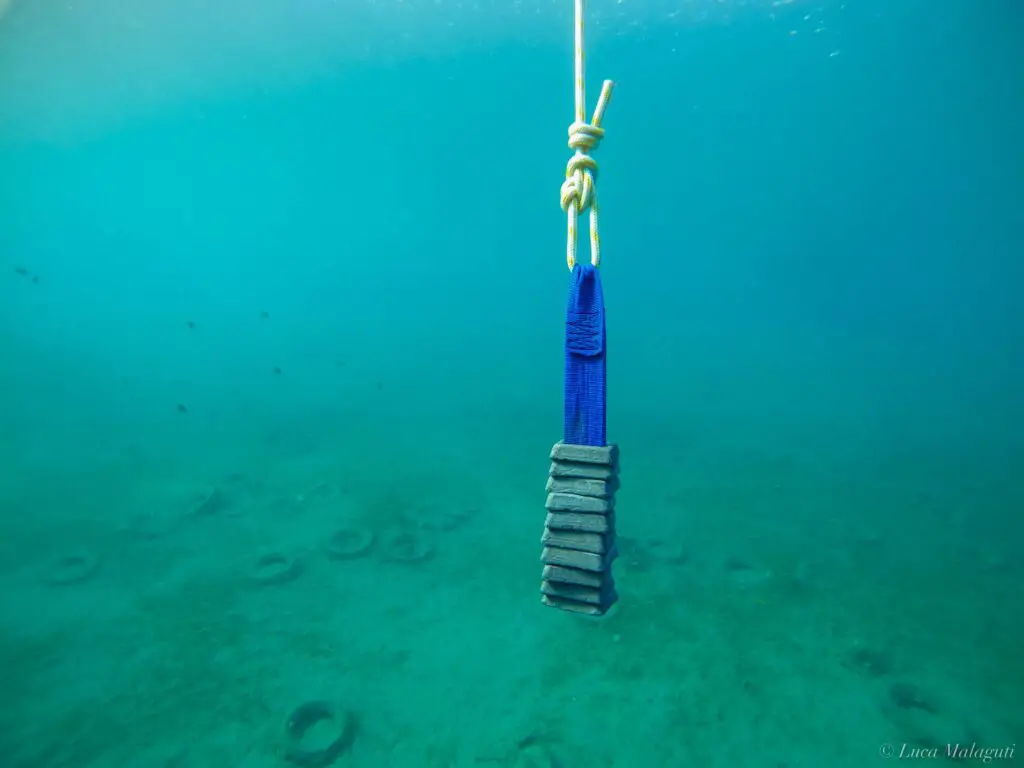
- Bottom plate
- Bottom weight
I’ve started using the 2BFree Equipment recently from Alexander Bubenchikov and I quite like it. This includes the pulley system, the stopper and the bottom plate. I find this gear of really good quality, and most importantly very easy and safe to use.
Please note there’s plenty of other amazing gear out there you can also use. I’m writing about this gear in particular because I like it very much, and I trust its quality and safety.
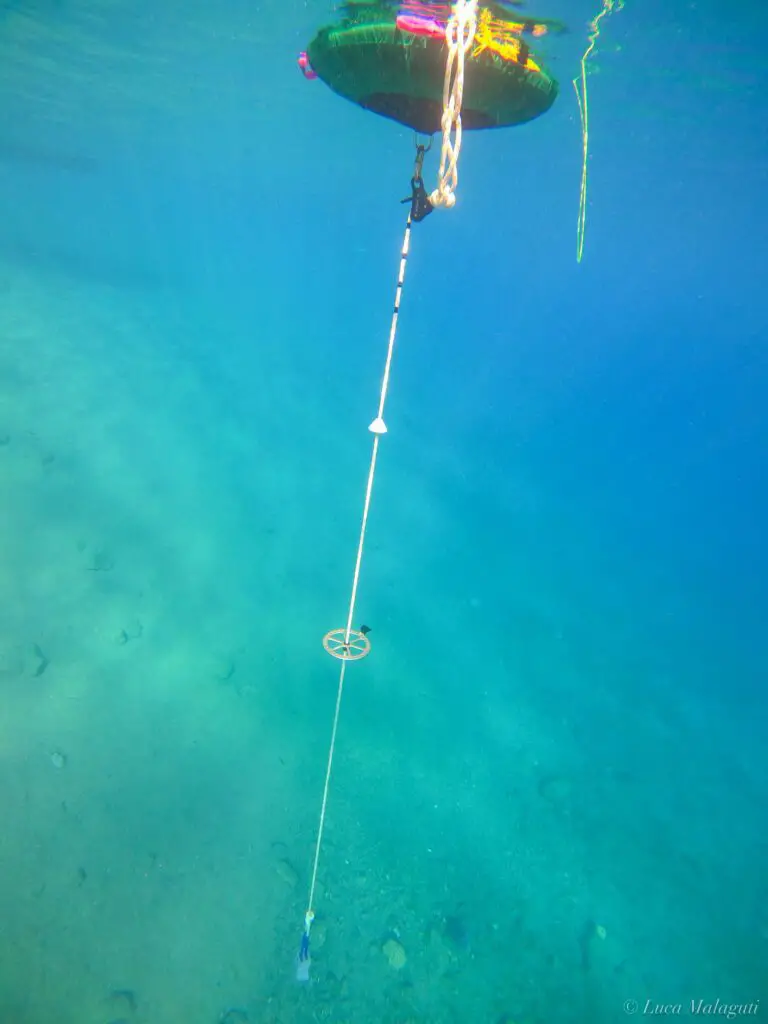
One thing worth noting in the above setup (see above image) is the distancing. I’ve purposely made sure there’s at least 2-3 meters between bottom plate and bottom weight. Why?
Two reasons:
- I’ve seen people’s lanyards get stuck or wrapped around the bottom weight when the turn at the bottom plate.
- I’ve witnessed people smashing their heads on the bottom because the buoy and bottom weight drifted in a shallower area. If you have enough distance (i.e. bottom plate to bottom weight), you’ll feel the line loosening and have enough clearance in case your diver has reached the bottom.
Tie the Correct Knots! (or Hitches)
We should definitely learn a few knots and hitches if we’re responsible for our own setup in freediving. Like Gary says, “you don’t need to know a thousand, just learn three really well”. Simply practice a few times, and you’ll drastically reduce the risk of something bad happening.
I highly recommend every instructor and athlete learns the following two knots and one hitch:
- Figure 8 on a “Bite”: Classic knot used in climbing. Super useful for tying any loose end off. View how to do this here.
- Double Loop Bowline with Fisherman’s Back-Up: Super useful knot and excellent for tying off the BOTTOM WEIGHT. That’s right, the regular bowline is NOT APPROPRIATE. Please use this. Learn here why.
- Clove Hitch: Very useful and very quick to make. Also comes undone very easily. Learn how to do it here.
The Double Bowline with a Yosemite finish doesn’t take all that much more rope nor time to tie. It guarantees more friction and reduces the likelihood of loosening during cyclical loading. Throw on a final Fisherman’s as a back-up, and your peachy.
Why is this awesome for your bottom weight?
It won’t come undone (i.e. highly unlikely) and it’s very easy to undo since the load is taken by the Bowline and not the Fisherman’s! Two things you want in every knot: EASE OF USE and SECURITY.
2BFree Equipment Review
One way to reduce the probability and consequence of hazards in freediving is by using good quality safety gear. We’ll turn our attention to something many freedivers often overlook: your buoy setup and line equipment.
I was fortunate to meet world record holder Alexander Bubenchikov recently in Dahab, Egypt. Alexander owns and fabricates the 2BFree Equipment line. He started making this gear with a focus on safety, practicality and ease-of-sue.
He asked me to test out some of his gear and let me know what I thought about it. Here’s a few thoughts I have, tips and tricks about using this gear.
The Pulley System
The 2BFree pulley is an auto-locking ratchet pulley-system with a slightly different shape. It’s designed with an irregular axis, where loading occurs mostly on one wheel, thus reducing overall friction.
Specifications:
- Body material: anodised marine grade aluminium
- Wheels: black polyacetal
- Axes: polished stainless steel in order to reduce friction
- Rope: Works ideally with ropes between 10mm to 12mm
The main advantages of the 2bFree pulley is low friction and a well calibrated geometry what gives smooth and precise work.
Alexander Bubenchikov, 2BFree Equipment.
Results of our In-Water Test:
We tested this device by having a 10 kg bottom weight and pulling a grown adult (80 kg man) from 30 meters (100 feet). This resulted in a “rescue” of under 45 seconds. My arms were exhausted yes, but the job was done, by myself, in a decent amount of time.
I’ve also tested pulling up a 10 kg bottom weight from 50 meters (150 feet) in 55 seconds. So far, this is the easiest pulley I’ve used. Personal opinion of course.
The Stopper
The stopper is made of polyacetal and designed to mimic the shape of the Apollo 11 spaceship return pod. This shape is also specifically made to ensure the carabiner of the lanyard will not get stuck.
Having a tennis ball as a stopper has two main disadvantages:
- The tennis ball is soft and can deform easily. Thus you can have equipment, from fins to lanyards, get stuck. Yes, this has happened before at depth.
- You have to tie a knot (i.e. fisherman’s) to attach the tennis ball to the line. Tying permanent knots on ropes that are loaded (even with small loads) decreases the overall strength of the rope.
The stopper must be made of a tough material (i.e. tennis ball = risk of the carabiner getting stuck). I have tested this with repeated 30 meter dives and it’s easy to get stuck during a normal freefall.
Kimmo Lahtinen, Former AIDA President and AIDA Judge
Main advantage of this stopper:
The 2BFree stopper is modular. That means you can easily remove it (along with the bottom plate) and change the pulley, for example. With a standard allen key, you unscrew the “bolt”, and the stopper slides out.
Nothing permanent on your main line. A fantastic feature for travelling.
The Bottom Plate
The bottom plate is made of anodized marine-grade aluminium and has a sleek design in order to reduce a drag. Rather than a solid block, having “holes” in your bottom plate makes a big difference when pulling it up from depth.
The bottom plate has central part made of black polyacetal and the same stainless steel flat tip screw to affix it on a rope. In other words, one allen key to setup both the bottom plate and the stopper.
Similarly to the stopper, the system is modular. So you can remove the bottom plate as well as the stopper after each dive for storage or travel.
Freedive Wire Recommendations
The stainless steel flat tip screw used for both the stopper and the bottom plate are designed to not damage the rope. However, depending on the type of rope used, if tightened too much, the steel screw can still leave a permanent depression into your rope. Try not to tighten the screw too much to avoid any damage.
The pulley system lever can be easily activated if accidentally pushed down. For example, in the Blue Hole, we tether each buoy to a surface line. If that surface line (i.e. well-tensioned) hits the lever at the right position, it can activate it to be released. Simply be aware that, like most pulley devices, any external object could result in a release.
References
Rock and Ice Magazine. Climb Safe: Rethinking the Double-Loop Bowline Rethinking. May 22, 2017. https://rockandice.com/climb-safe/climb-safe-rethinking-the-double-loop-bowline/
Zen and the Art of Climbing. The hows and whys of tying in with a Bowline. February 10, 2019. https://zenandtheartofclimbing.com/tying-bowline/
Freedive Wire Blog. Alpine and sea: What climbing can teach us for freediving. October 10, 2020. https://www.freedivewire.com/ice-climbing-and-freediving/
2BFree Equipment. https://2bfreeequipment.com
Animated Knots. https://www.animatedknots.com


Pingback: Ice & Ice: Climbing and Freediving on Frozen Giants - Freedive Wire